
How to share my Android Internet connection to my other Wi-Fi devices
This is the most efficient way to tether your Android smartphone to your other Wi-Fi-capable devices: it's fast and it's wireless. This set up is also advisable if you're connecting to a public internet or if your connection is limited to only your Android. This article shows you the steps to do this.
Hardware requirements: internal Wi-Fi card, external Wi-Fi USB adapter (optional).
Step 1: Download and install Connectify Hotspot on your PC. Every edition, including Hotspot Lite (free), can share an Android connection made with USB tethering or with the phone's own Wi-Fi hotspot, because your PC sees those as ordinary Ethernet and Wi-Fi connections. A PdaNet+ connection is different: Connectify Hotspot treats it as a dial-up connection, so sharing it needs Hotspot PRO or MAX.
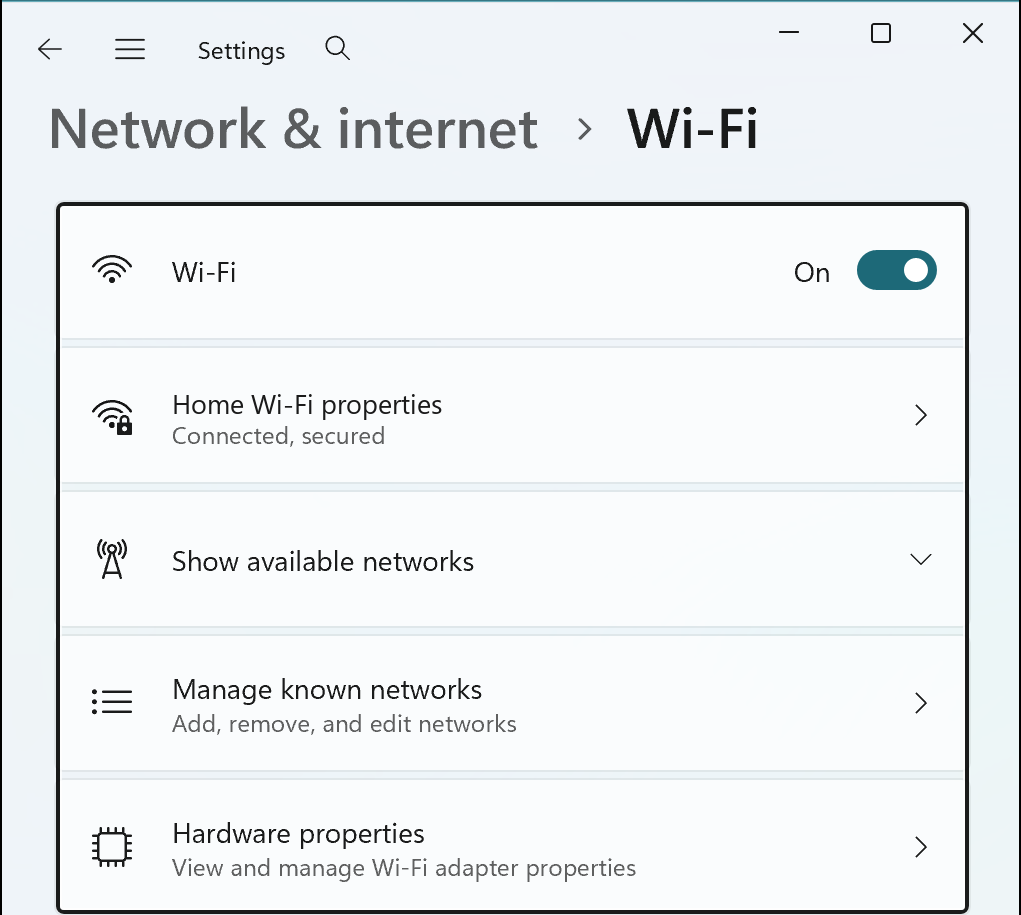
Step 2: Make sure you have a Wi-Fi card installed on your PC and it’s on. Open Windows Settings > Network & internet > Wi-Fi and check that Wi-Fi is turned on. If your computer doesn’t have an internal Wi-Fi card, get an external Wi-Fi USB adapter and plug it into a USB port of your PC. Windows will install the appropriate drivers or you may be required to install them - just see the documentation you get with the device. You may need to restart your PC before being able to use the external Wi-Fi USB adapter.
Step 3: There are several ways to tether or share your Android connection to your computer. Please see these options below.
- How to Tether an Android to a PC via PDANet+: Wi-Fi
- How to Tether an Android to a PC via PDANet+: USB
- How to Tether an Android to your PC via Wi-Fi
- How to Tether an Android to your PC via USB
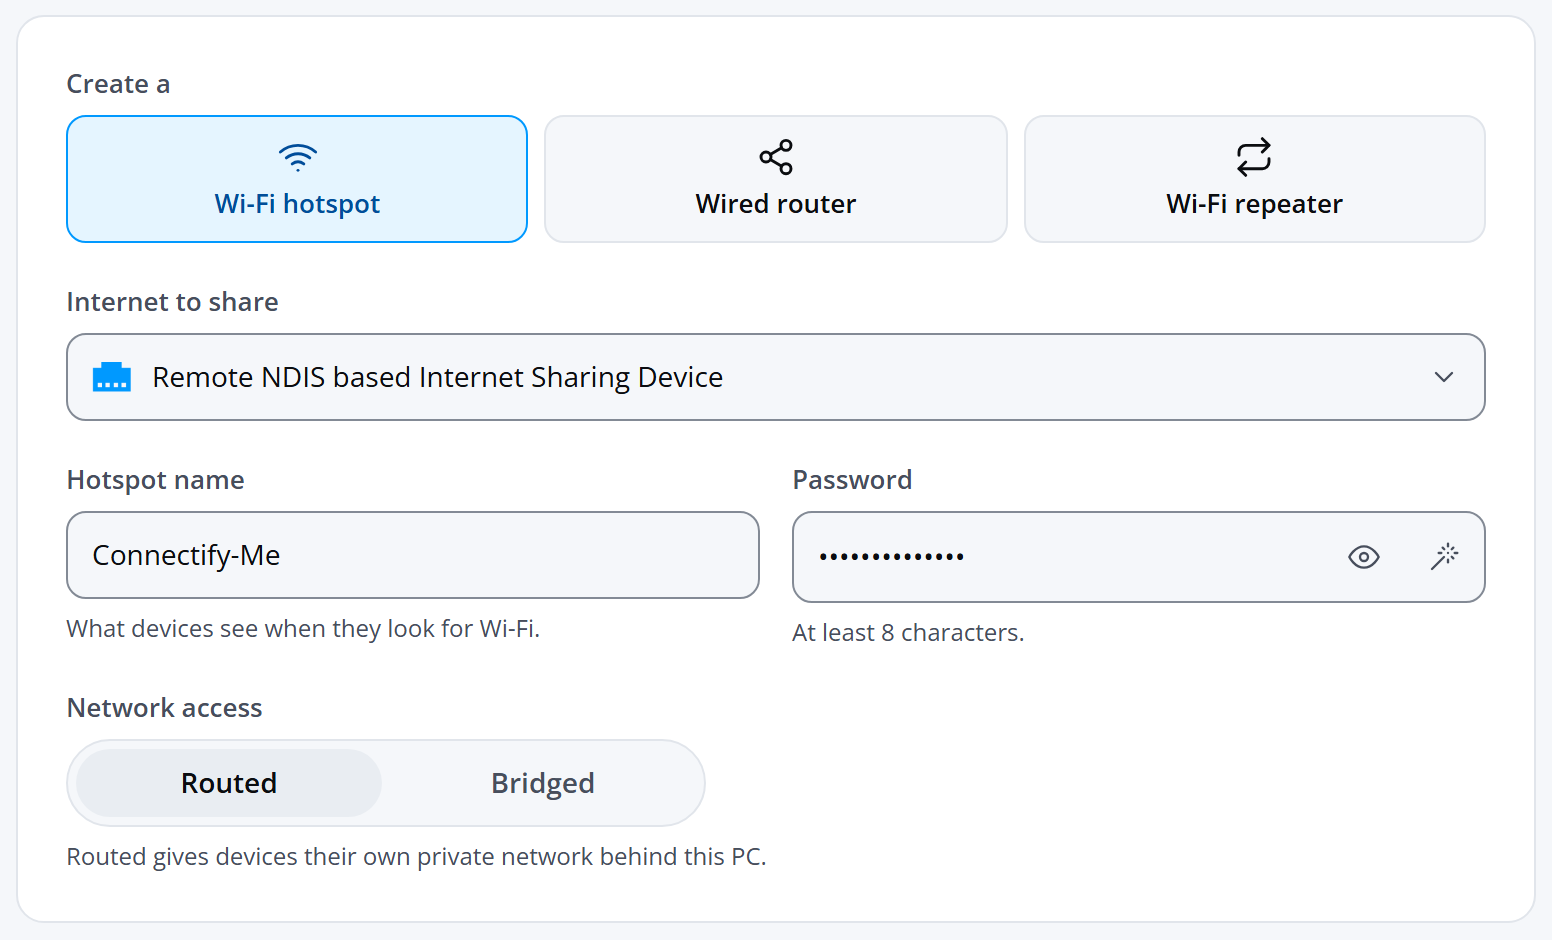
Step 4: Open Connectify Hotspot. On the Hotspot screen, under Create a, choose Wi-Fi hotspot.
Step 5: Under Internet to share, choose your Android connection. Icons next to each connection tell you what kind of Internet connection you’re selecting:
- USB tethering: usually Remote NDIS based Internet Sharing Device, with an Ethernet icon.
- Your phone's Wi-Fi hotspot: the name of the phone's Wi-Fi network, with a Wi-Fi icon.
- PdaNet+: PdaNet Broadband Adapter, with a modem icon.
Step 6: Set a Hotspot name and a Password. The hotspot name is the network name that other devices will see and connect to using your password, which needs at least 8 characters. On Hotspot Lite, the name starts with "Connectify-". Your Connectify Hotspot is a real, working hotspot that you use just like any other wireless network.
Step 7: Leave Network access on Routed, the default. Bridged (Hotspot MAX) isn't available with PdaNet. Learn more about the difference between Routed and Bridged by clicking this LINK.
Optional: turn on Block ads in the Protection card, as this feature will save you a lot of data. Learn more about the ad blocker in Connectify Hotspot.

Step 8: Click Start hotspot to begin sharing your Internet connection with your other devices.