
How to Tether an iPhone or iPad to your PC via Wi-Fi
This is the most efficient way to tether your iPhone to a PC: it's fast and it's wireless. This article shows you the steps to do this.
Hardware requirements: internal Wi-Fi card, external Wi-Fi USB adapter (optional)
Step 1: Purchase Connectify Hotspot PRO or MAX from the Connectify website. While there is a free trial version of Connectify Hotspot, sharing 3G/4G or Ethernet connections as Wi-Fi is only available in the PRO and MAX versions.
Step 2: Make sure you have a Wi-Fi card installed on your PC and it’s on. Go to Network Connections (Windows key + X - select Network Connections) and click on Wi-Fi on the left. If your computer doesn’t have an internal Wi-Fi card, get an external Wi-Fi USB adapter and plug it into a USB port of your PC. Windows will install the appropriate drivers, or you may be required to install them - just see the documentation you get with the device. You may need to restart your PC before being able to use the external Wi-Fi USB adapter.

Step 3: Create a Wi-Fi hotspot on your iPhone (Wi-Fi tethering). To do this, go to Settings on your iPhone's home screen and activate the Personal Hotspot option.
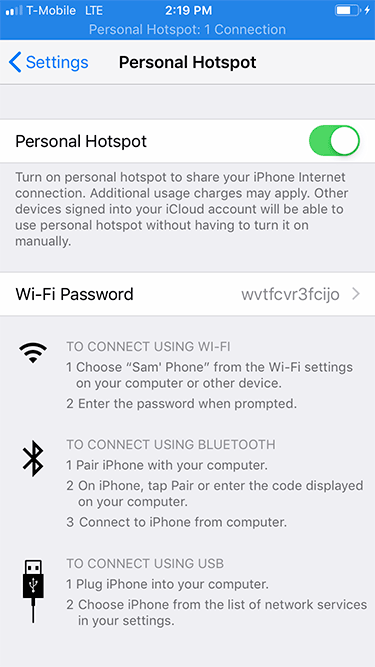
Step 4: Configure the Wi-Fi hotspot on your iPhone. When you go into the Personal Hotspot menu, you can also customize the Wi-Fi hotspot name (SSID) and password used by other devices to connect.
Step 5: Connect your PC to the Wi-Fi network. Click on the computer or Wi-Fi symbol in the lower right corner of the taskbar (systray). Turn on Wi-Fi by clicking on the tile in the lower side of the pop-up menu and select the Wi-Fi hotspot you set up on your iPhone. Enter your password and you’re good to go.
